Webflow launched in 2013 and as of February 2021 powers nearly 200,000 live sites all around the world. The company is based in San Francisco and was founded by three technophile entrepreneurs named Vlad Magdalin, Sergie Magdalin and Bryant Chou. The Webflow platform caters for website building and hosting, so you have everything you need to create and launch your website in one place.
Big brands like Zendesk, Dell, Upwork, Getaround and Petal use the Webflow platform to power their websites. That leaves little doubt that the hosting services pack a punch and can support high volumes of traffic.
The magic of silicon valley must have rubbed off on the creators of Webflow as their online visual editor that allows you to design, build and launch websites seems to be far superior to anything else out there. However, the editor is just one aspect of an all-in-one platform. So, we explored Webflow in detail to find out if it could take the spot of our top-rated website builder. Sure, it might be suitable for techy nerds and large companies, but can it also be used effectively by the everyday user?
If you don’t feel like reading the full review right now, no worries. You can save some time by skipping ahead to the bottom line to find out if Webflow is the right platform for you.
If you decide to give Webflow a try for yourself, you’ll immediately notice that it’s a grade or two above what would be considered beginner-friendly. And, that’s exactly what it’s supposed to be. Webflow was designed to cater for web developers that want all the flexibility of platforms like WordPress or Drupal but at the same time want the efficiency that comes from all-in-one website builders like Wix or Shopify. The result is Wix on steroids.
It’s too complex for complete beginners but it provides an advanced integrated tool kit for intermediate to expert web creators. It bridges the gap between simplistic site builders and advanced open-source CMS’, targeting a niche of users that want industry-leading results for a reduced upfront cost and with a faster setup time.
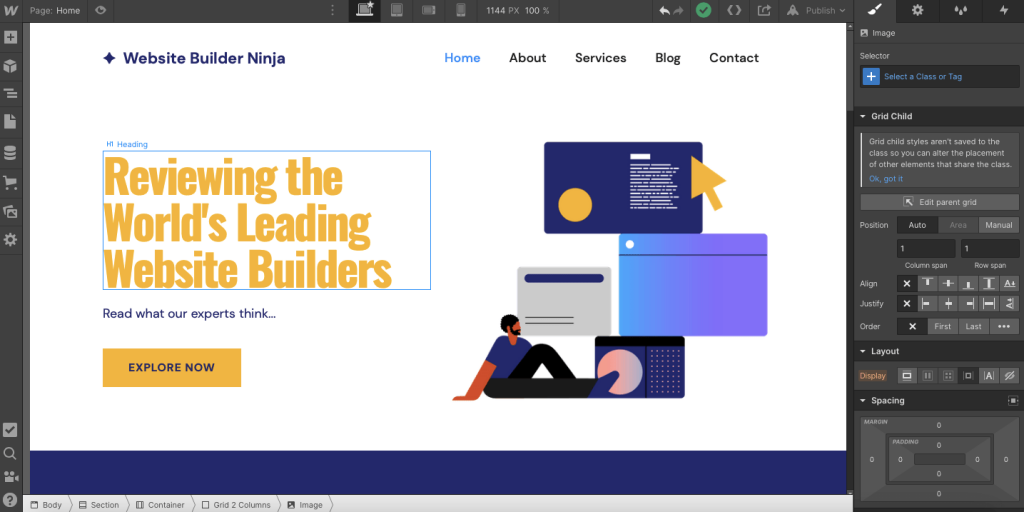
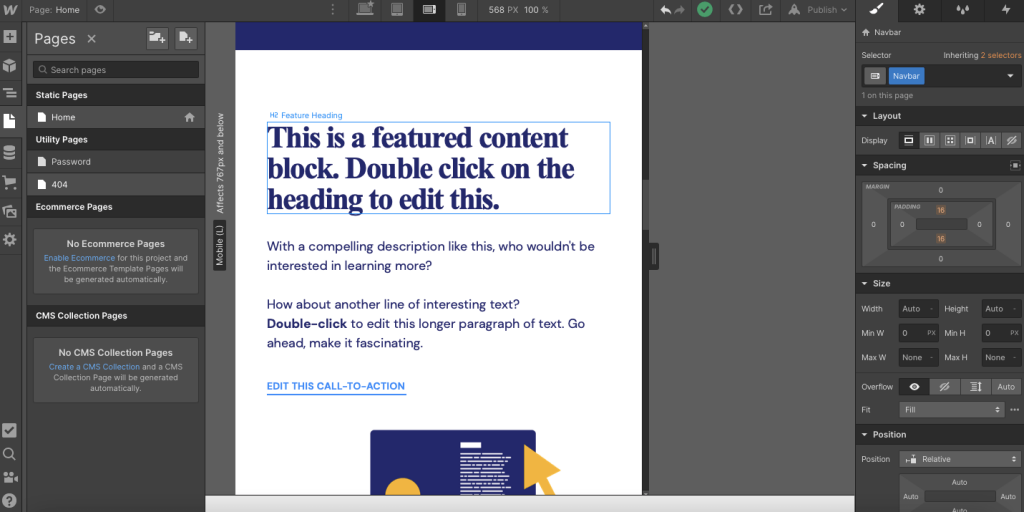
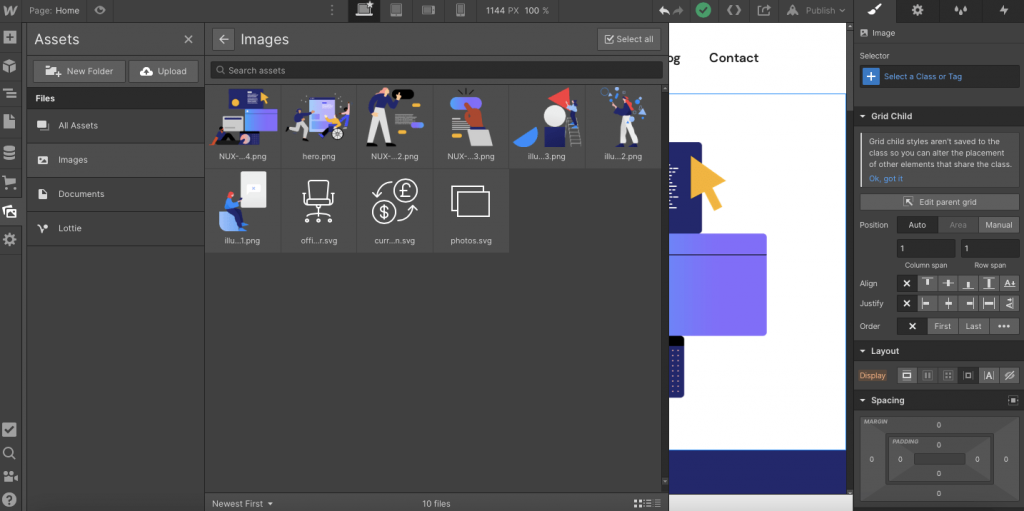

We’ve already touched on the fact that Webflow is not the most beginner-friendly platform. Especially when compared with other brands. However, the user interface has been designed in such a way that everything is easy, and I’d even go as far as to say a pleasure to use. It’s the sheer amount of options available to developers that would overwhelm beginners rather than the platform necessarily being hard to use. It is, after all, a no-coding-needed platform.
Webflow does indeed have drag and drop editing enabled on its platform. And as far as drag and drop editors go, it’s up there with the best of them. There’s very little lag and you can simply move things anywhere you want.
It also combines with a snap-to-grid function to help with aligning your elements perfectly. Not only does this help novice users create professional-looking designs but it also speeds up the process for more advanced developers as well. There’s no need to fiddle around (although you can if you want) to find the perfect alignment, just drop it to a rough position on the page and Webflow will do the rest.
Although the snap-to-grid function has limitations in terms of where you can place stuff on your web pages. The main benefit is that this keeps the code beneath the changes you make to the CSS grid more concise and efficient than if it were a free for all.
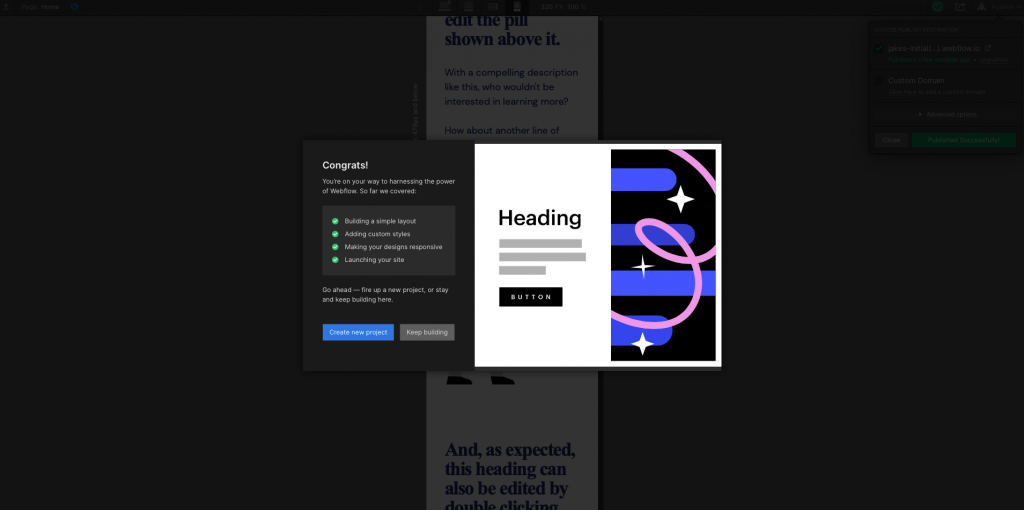
The positivity continues into the next section as onboarding tutorials is another area where Webflow shines compared to its competition. When you first load the editor you will be given a guided tour. Along the way, you will be asked to perform certain tasks like adding titles, changing font size, optimizing for different screen sizes and a bunch of other stuff.
I was impressed with how detailed the tour was and at the end of it, I actually felt like I had a basic grasp of how to use Webflow. So, a job very well done, and trust me, it’s not how you feel after every website builder onboarding tutorial.
If you feel like you still need a bit more help with getting to grips with the platform after the initial tutorial you can head over to the Webflow University and take the Webflow 101 crash course. It’s roughly two hours long and covers most if not all of the elements most beginner to intermediate users will use on the platform. There’s also a bunch more stuff to get you operating at a more advanced level as well.
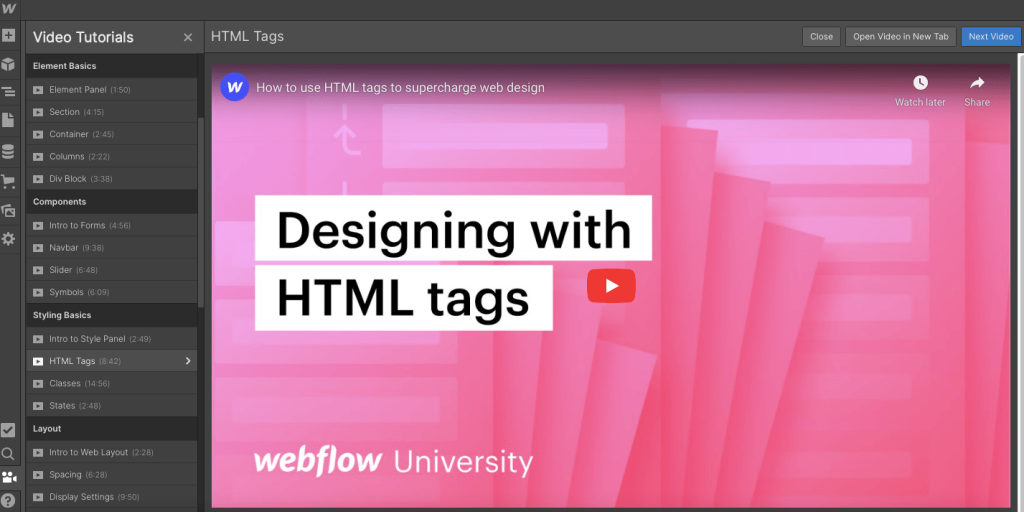
And, if you still want additional help to understand how to use specific features within the platform, there are dozens of video tutorials. They cover everything from web structure to basic elements and from responsive designs to CMS collection fields. To find them, hit the camera icon in the bottom left of your screen whilst on the editing page.
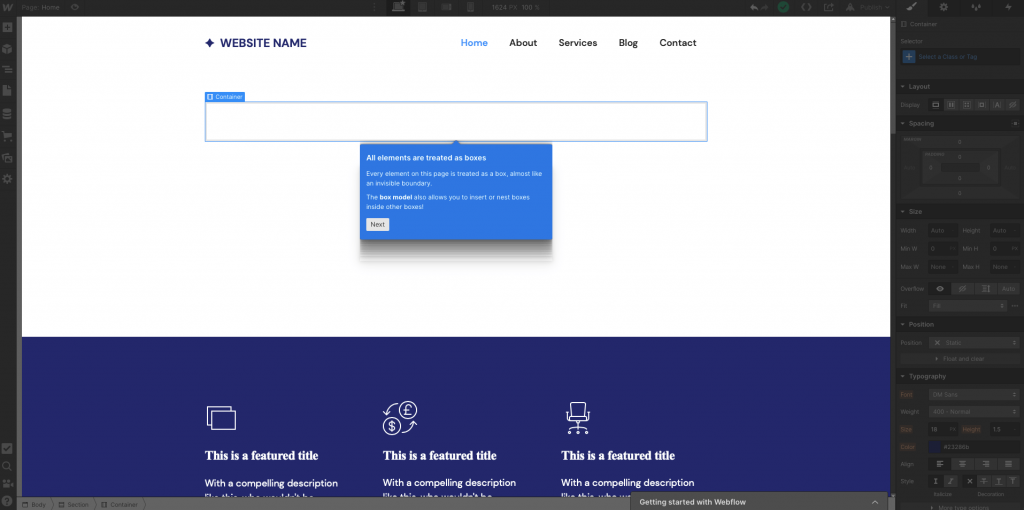
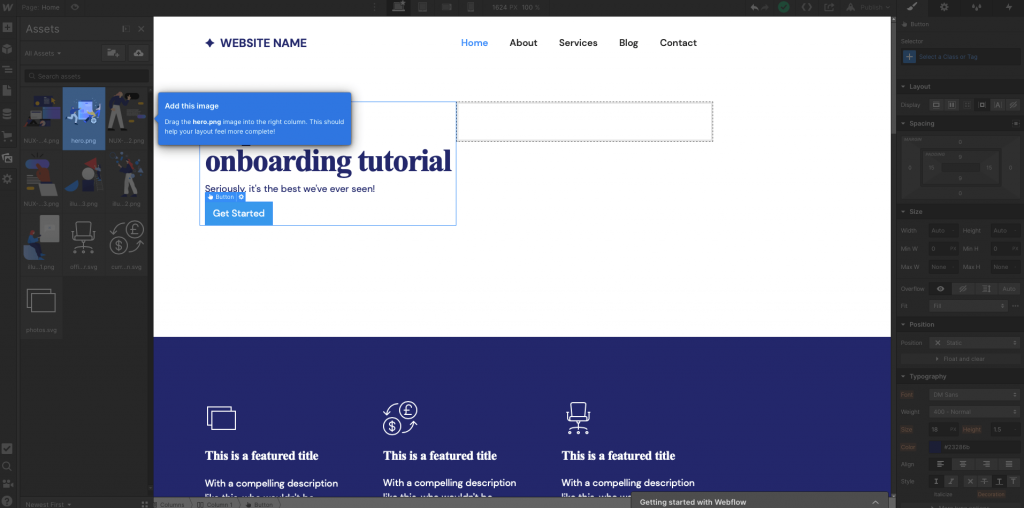
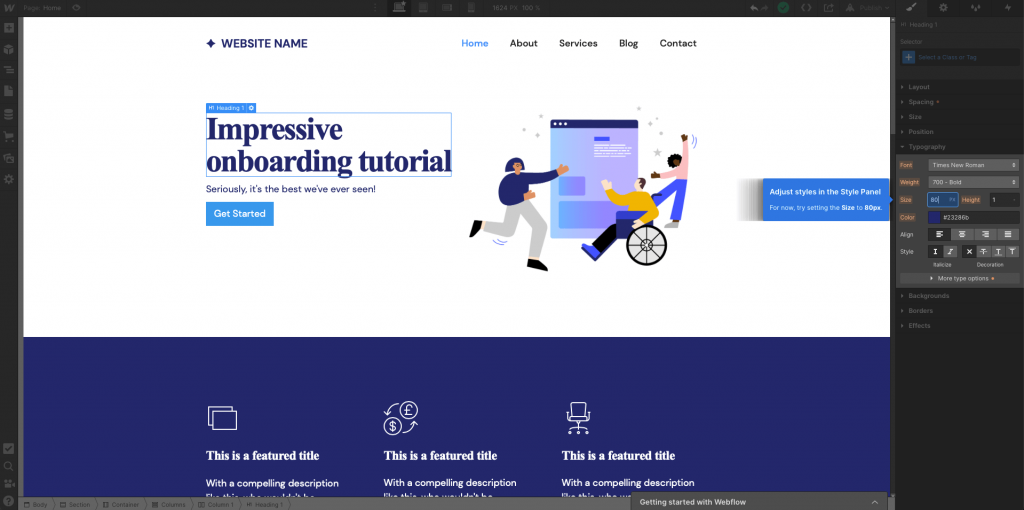
It’s possible to start with a completely blank canvas but for those of you who want a little head start, you can use one of the 30 free or 100 premium web templates. Some of them even come with an SEO-friendly site structure already built-in. So, you can just dive straight into the designing and you will automatically have a high-performing website.
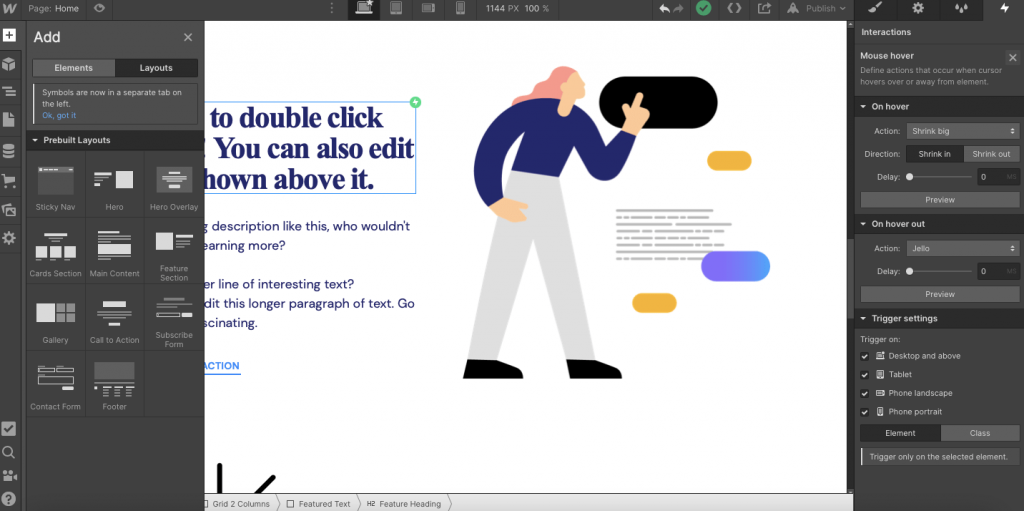
In the left menu bar, there is a tab that has everything you need to add new elements and layouts to your site. You can search for specific elements or pre-designed layouts like galleries, call-to-action, contact forms and more that you can simply drag and drop onto your screen.
If you want to edit an element you just need to double click on it and cast your eyes over to the right menu bar. You have ultimate control over the CSS files without having to even look at or type a single piece of code. You’re able to edit the layout, spacing, size, position, typography, background, borders and effects of each content block. This level of control is something that you normally only get with advanced CMS platforms.
The second tab on the right menu bar is the element setting menu. This is where you can edit handy things like heading types (H1, H2, H3, etc.), image alt text, and add custom attributes for unique design properties.
The third tab houses all of your classes. Classes on Webflow can be used to automate the styling and design for certain ‘classes’ of elements. For example, you can create a class for buttons. You’ll input information about the padding, colour, font and shape of your buttons before saving it as a class. Then, every time you add a new button you can assign it to the class and it will automatically match the others on the site. No need to make all the changes again. It also gives you the flexibility to have various classes for the same element if you plan to use them differently across your site.
The fourth and final tab in the editing panel is the most exciting. It’s the interaction panel which enables you to add animations and effects to your website elements. Usually, adding these sort of effects to your website requires expert knowledge and are therefore going to be expensive or simply not possible. However, on Webflow they’re made easy. So, you can look like a pro with little effort required. You can create interactions to trigger on mouse hovers, mouse moves over element, while scrolling in view, and more. You can create more advanced effects with Adobe After Effects, but more on that later.
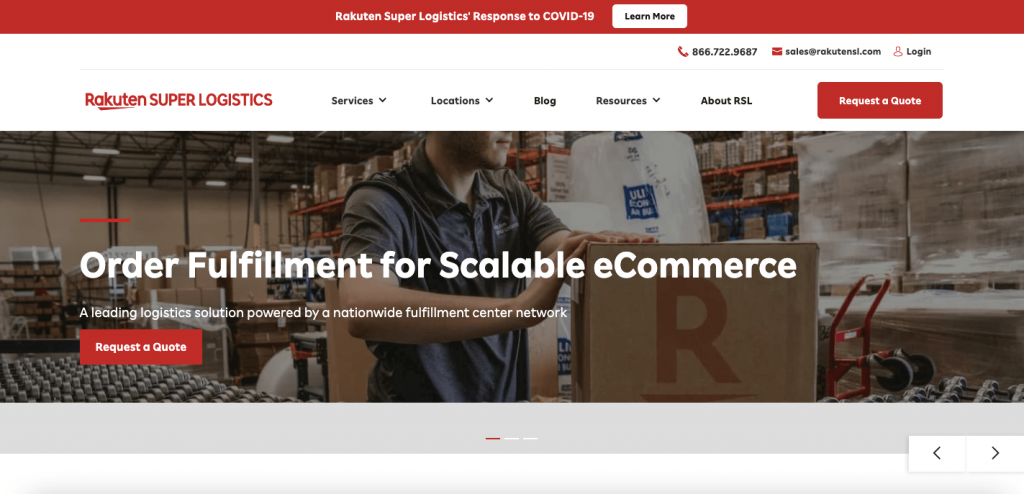
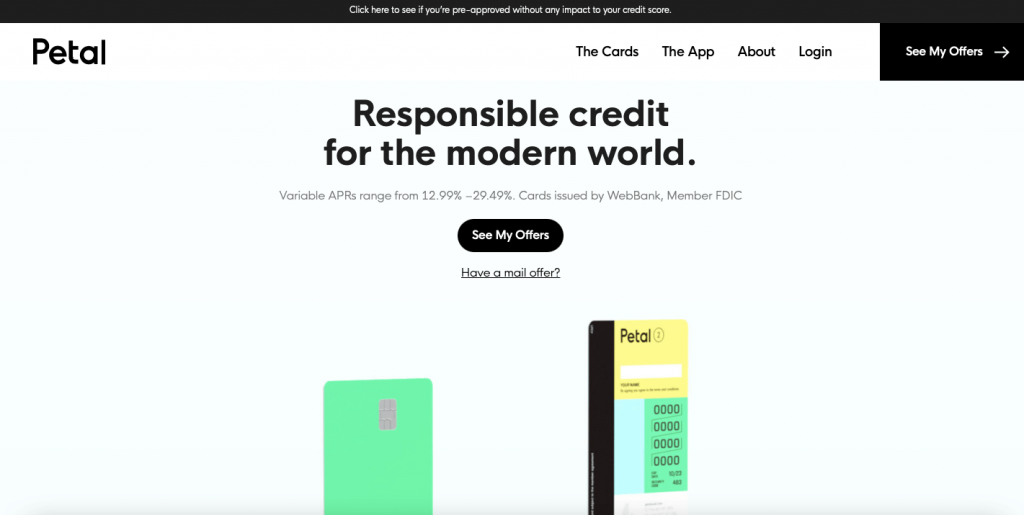
www.petalcard.com
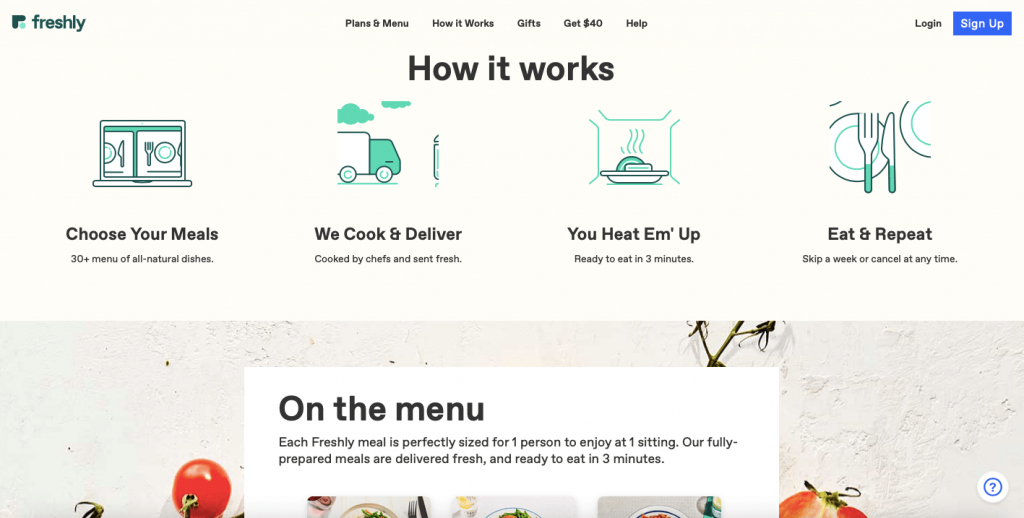
www.freshly.com
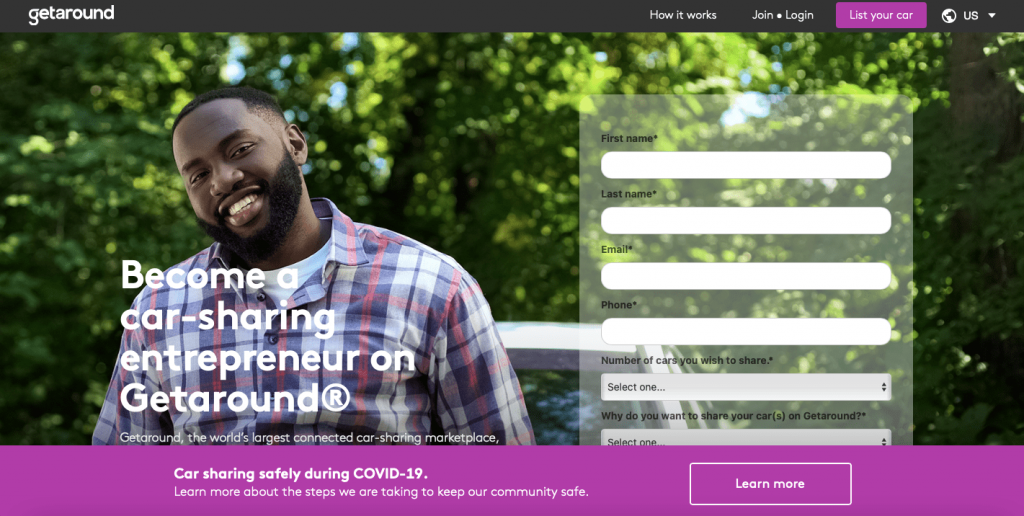
www.getaround.com
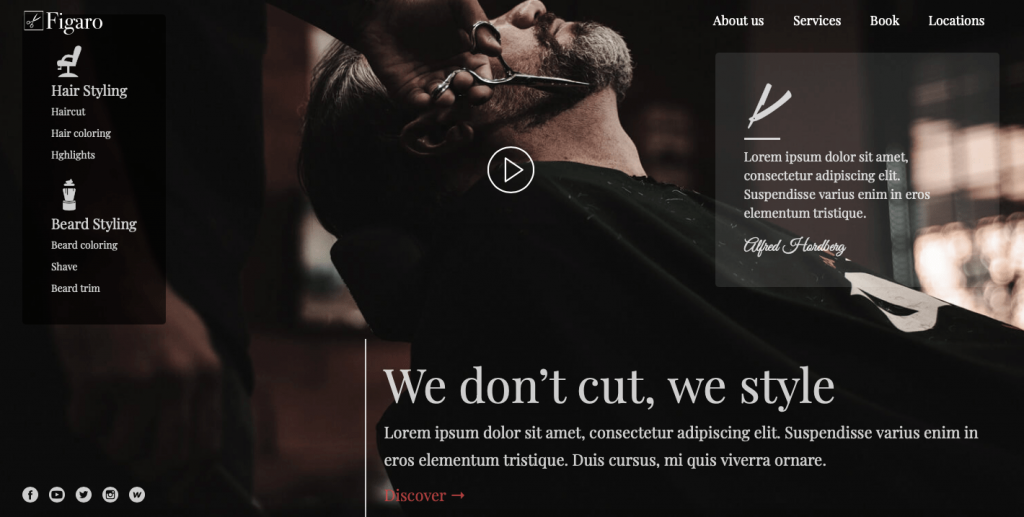
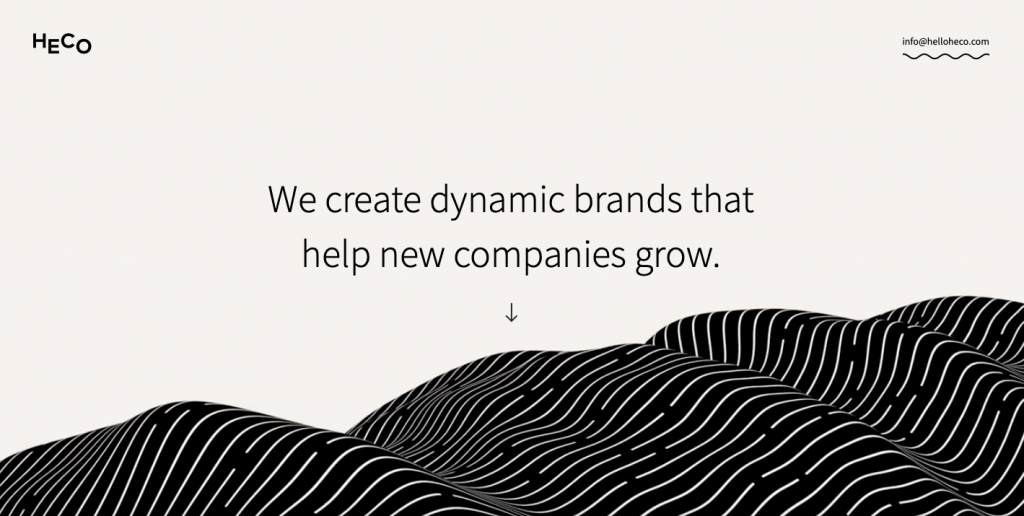
www.helloheco.com – This one is a MUST SEE!
www.rakutensl.com
We’ve already talked about the industry-leading visual editor that allows users to make changes directly on the page without having to code, but what else does Webflow offer in terms of features and tools.
Something you’ll hear in all of the Webflow video advertisements is “Webflow, where CMS meets visual design”. It’s probably the highlight feature of the platform. It’s been made in a way where designers, editors, content strategists and developers can all work from the same page without getting in the way of each other.
The Webflow CMS allows a lot of flexibility when it comes to designing custom content types like blog posts, forms, web pages, etc. You also have the ability to create customizable fields that can be linked with real data from your CMS which makes it easier for bigger and more complex projects. For example, let’s say you want to create a team members page where a picture and other basic info about your team is presented. You can create a CMS collection which is basically a specific content type. You can design it with custom fields like name, DOB, biography, etc and populate the data by syncing with your CMS or from a CSV file. If you have 100 plus team members it can really save some time and ensure a consistent design.
Webflow uses Amazon Web Sevices for hosting which claims to provide a 99.9% uptime. It’s the same service that Netflix, Airbnb, Slack and Adobe use. So, you can rest assured that it will be able to handle any traffic spikes that you might get.
You’ll also have access to built-in SEO tools that allow you to edit metadata controls like author, date created/modified, and image alt-tags. You can edit HTML headings, create 301 redirects, and canonical tags easily, while the site automatically creates XML sitemaps.
Adobe After Effects is often regarded as the most advanced web animation software. Usually, it’s reserved for experts and requires some coding to integrate designs with your website. However, Airbnb developed Lottie which is a piece of software that allows you to use animations as easily as regular images on any native app. So, you can make animations on Adobe After Effects, export it to a Lottie JSON file and upload that to your Webflow site. You can then use Webflow interactions to control that animation as visitors move through your site.
Webflow’s advanced design features and integrated CMS was out of bounds for online store owners until 2019 when the company launched its ecommerce features after nearly 6 months of beta testing.
The highlight of Webflow ecommerce vs other ecommerce platforms is that users can create pixel-perfect advanced web designs for their online store to a level of detail that would need advanced coding skills on other platforms. I know from personal experience of using Shopify that it can be frustrating when you can’t present your products the way you want to or make simple changes to the theme without the need for coding. On Webflow, it’s easy to make those changes.
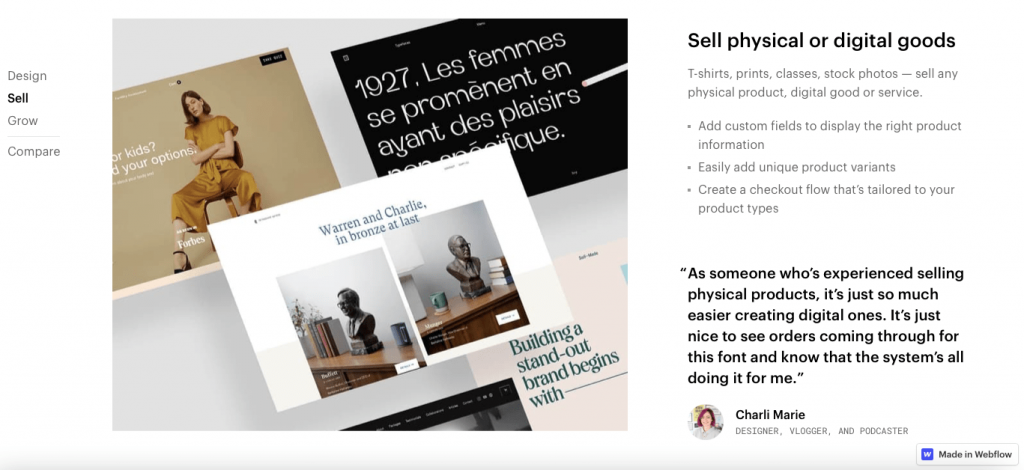
You can sell both digital and physical products, easily add-in product variants, and create a custom checkout process that’s suited to your business. You can set custom shipping rates, automate order tracking, offer takeout, and give your customers the option for local pickup.
Like any ecommerce website builder worth its salt, you also have the chance to link your site to native integrations or third-party applications. This will help boost the functionality of your store and allow you to work with the tools you need to simplify your business.
There is no built-in bookings or reservation feature on Webflow. However, there are several third-party applications available through Zapier that you can install to give your website a way to take bookings. Some of the apps, like Zeal Schedule, even have a free plan so you can start taking bookings for free. However, if your business takes 100+ bookings a month you will have to commit to a paid plan which adds another hidden cost to your Webflow website.
Webflow store owners can accept payments from more than 200+ countries via credit cards, Apple Pay, Google Pay, Paypal and Stripe. On top of that Webflow will automatically calculate sales tax and VAT when you sell to customers in the US, Canada, EU, and Australia.
If you sign up for the entry-level ecommerce plan you will be charged a 2% transaction fee on every sale. However, that goes down to 0% when you sign up for the premium ecommerce packages.
Webflow offers a free trial with no time limit. You can use all of the design features on the platform and create two projects so you can really understand how to use the platform and what’s possible before you commit any money. You can even publish your creations to a Webflow subdomain and access the 100+ hours of video tutorials. There are some limitations like a certain number of pages and you can’t sell products. However, you don’t have to switch to a paid plan until you are ready.
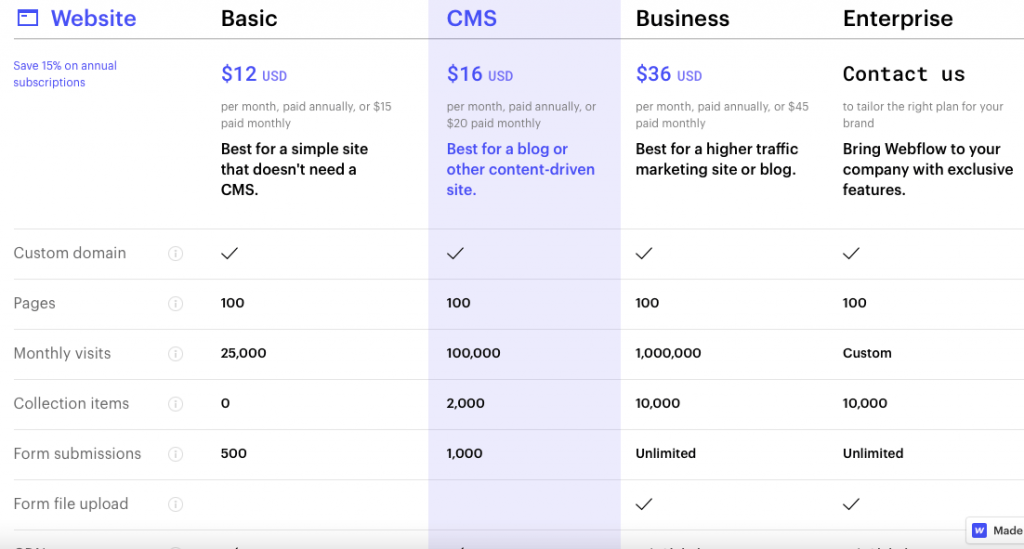
There are four site plans to choose from including a Basic, CMS, Business, and Enterprise plan. The Basic plan starts from $15 a month when paid monthly or $12 a month when paid annually. For that, you can create up to 100 pages, have up to 25,000 monthly visitors and 50GB of bandwidth.
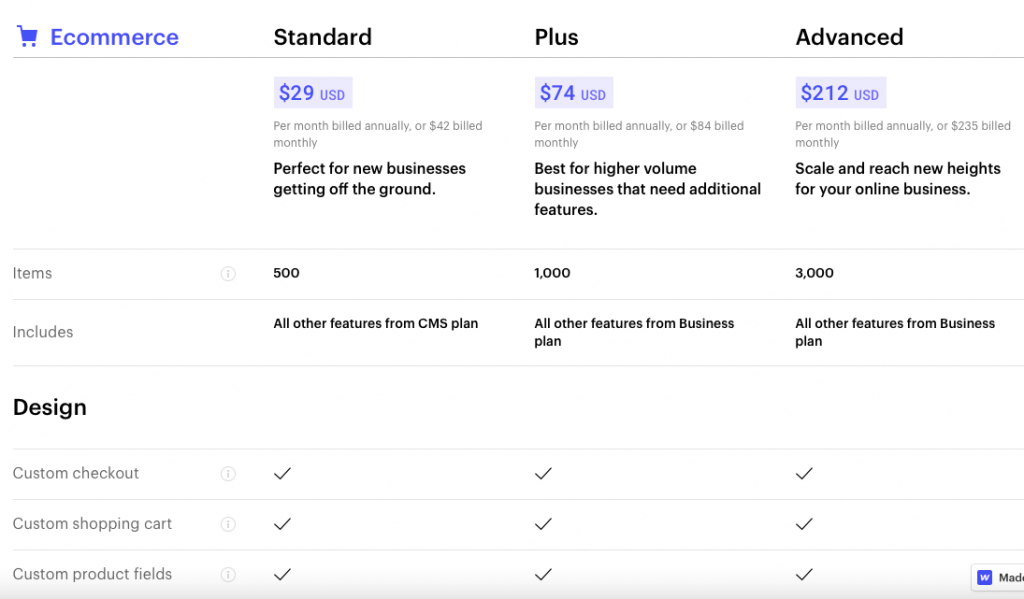
The eCommerce plans start from $42 a month when billed monthly. This will allow you to list 500 products and generate an annual revenue of $50,000 before you need to upgrade. You’ll get access to all of the features available on the CMS site plan as well as the basic ecommerce features.
The Webflow customer support team work Monday to Friday and communicate via email only. They aim to get back to your request within 24-48 hours of you submitting a request. There is a live chatbot, however, all it really does it classify your request to make it easier for the support team to manage.
There are more than 100 hours of video tutorials within the Webflow university page that will help you get up to speed on most of the basic to advanced functions available on the platform. For anything it doesn’t cover, there is a community forum where you can submit questions to other Webflow users to get their help.
There’s no doubt about it, the Webflow platform is impressive. Users have the ultimate control over their designs without the need for coding. However, it’s not without limitations. This is because the platform sticks to basic developing principles to make sure that the code created from your drag & drop designs remain as concise and efficient as possible. You’re unlikely to hit any creative roadblocks with the number of design options available to you though.
The learning curve is pretty steep compared with other website builders, especially if you want to learn how to use some of the more advanced and impressive features available to you. The Webflow university has all the information you need to get up to speed, so as long as you’re not a complete beginner, you’ll be able to become proficient in a decent amount of time.
The advanced design features combine with a long list of third-party applications and ecommerce features. In our view, this makes Webflow one of the best platforms out there that can cater to everyone’s needs. If you care about the design of your site, you know that it’s too complex for a normal website builder, and you don’t mind paying a bit more than average, Webflow is a good option for you.
Culpa irure ex veniam aliquip esse do deserunt sit duis do fugiat adipisicing minim elit. Ex voluptate et esse elit et fugiat proident esse ad. Minim voluptate pariatur commodo nisi anim nostrud eu reprehenderit cupidatat anim dolor. Et commodo aute anim enim anim irure. Ad adipisicing aliqua ea exercitation aliqua excepteur est adipisicing aliquip deserunt exercitation.
Learn More
We’ve pulled together 100 must-know website definitions to help you understand web development, SEO, and web analytics jargon. You’ll know what every confusing three-letter acronym means and more!
We take a look at the top 10 most successful Shopify stores on the internet and deconstruct their sales-boosting eCommerce optimizations so that you can apply the same techniques to your online store. Fashion Nova, Gymshark, and KITH are just some of the biggest Shopify stores analyzed in this article…

The upkeep of our site is made possible thanks to the advertising fee we charge featured website builders whenever a visitor completes a purchase through sponsored affiliate links. Financial incentives may impact the ranking itself and/or the score given. The scores assigned to featured brands are exclusively determined by Websitebuilderninja.com. The scoring and rankings are not regulated in any way and should be used by readers as guidance only.